-=< O >=-
a
Stained Glass
tutorial
…
-=< O >=-
My sister Trisha
invited us all to Dallas
for her 60th Birthday
party, calling it
her ‘T-Party’
!!!
This
party was
planned far in
advance, so
my
youngest
sister Edee asked
if I would consider
making something
in Stained Glass
.
She sent me
a photo of Trisha’s
favorite flower, the
Stargazer Lily
:

-=< O >=-
This looked like
something I could do, and
since Edee was interested in
the process I took photos
along the way
.
The photos
made it easy to create
a simple tutorial explaining
how to make Stained Glass
(using Tiffany’s copper
foil method)
-=< O >=-
so
HERE IT IS
!!!
-=< O >=-
You can
draw the pattern
on any sturdy material;
card stock, manila folders,
poster board, etc., but I
used software called
Glass Eye 2000
.

-=< O >=-
If you want to try it out,
you can use all the features
FREE for 30 days, and it
includes a nice tutorial
.
Here’s a link
:
-=< O >=-
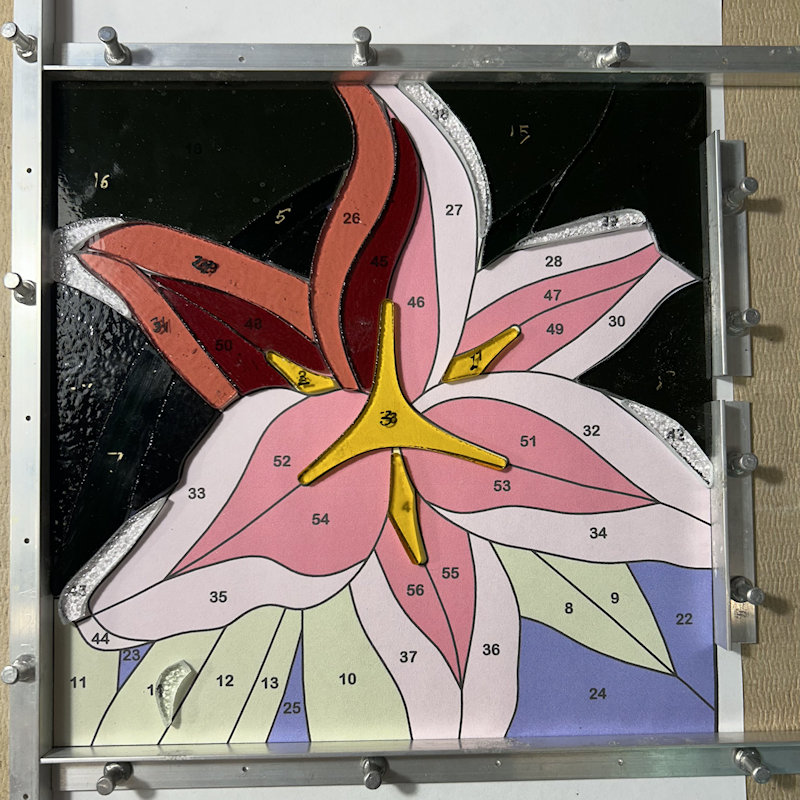
Since my
pattern is digital,
I can try different
color schemes
,
and
print out as
many copies
as I need
.
-=< O >=-
I
printed
one pattern
on card stock
to cut into
pieces
,
and another
to use as a guide
while I work
:
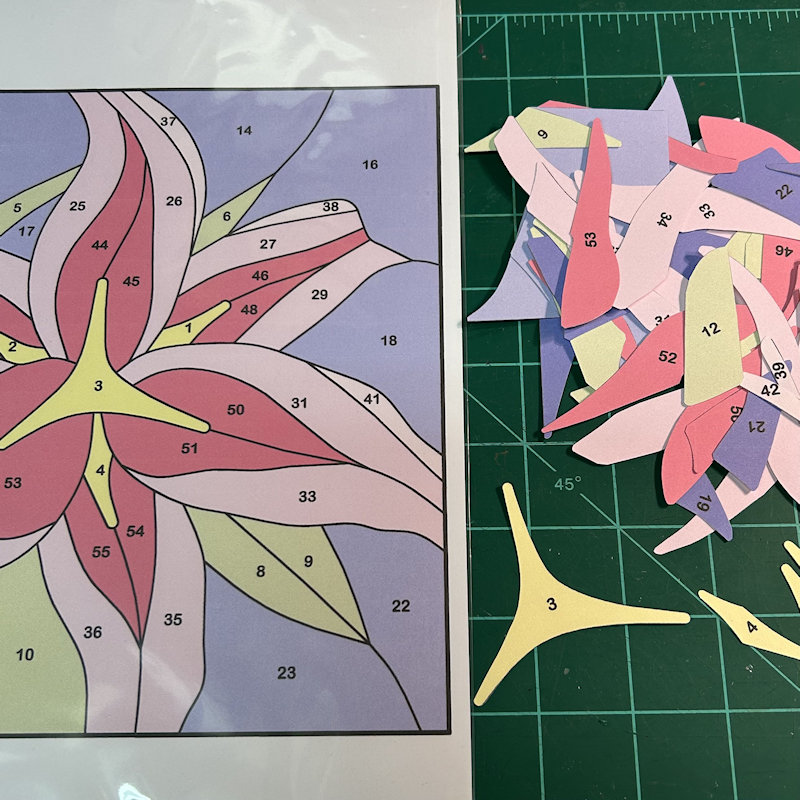
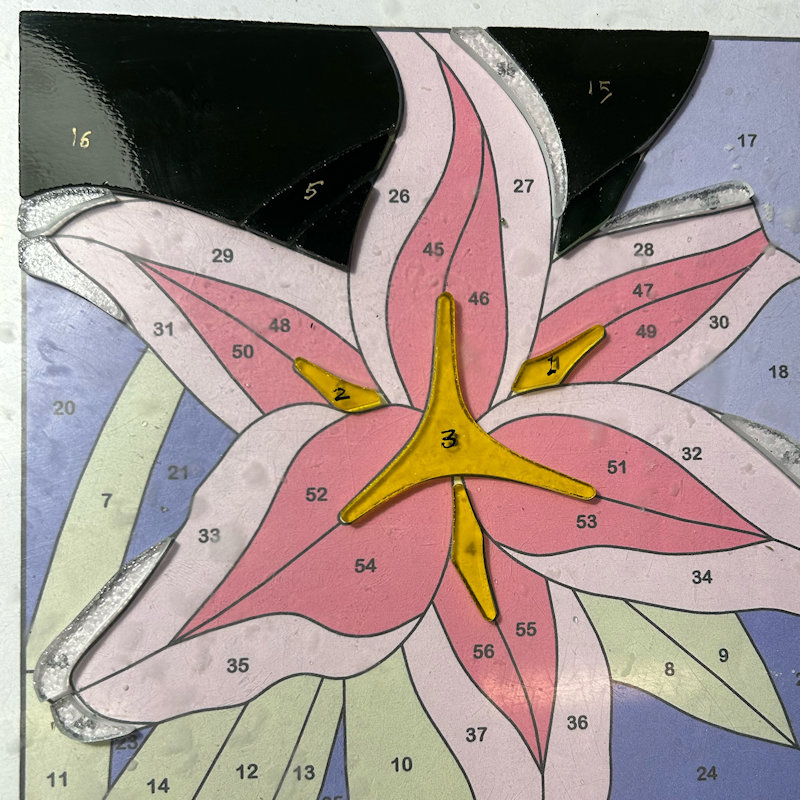
-=< O >=-
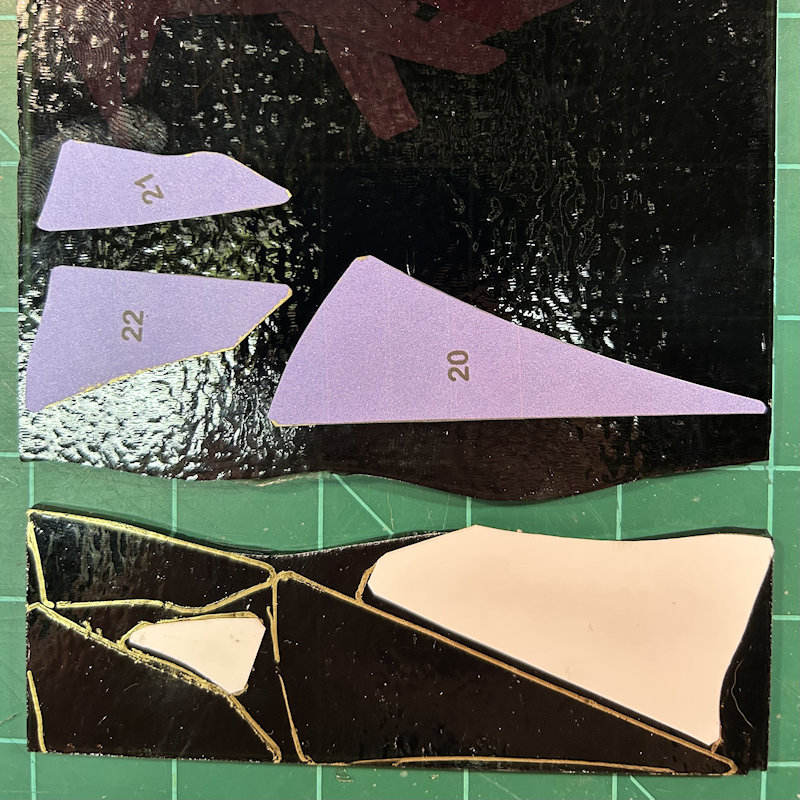
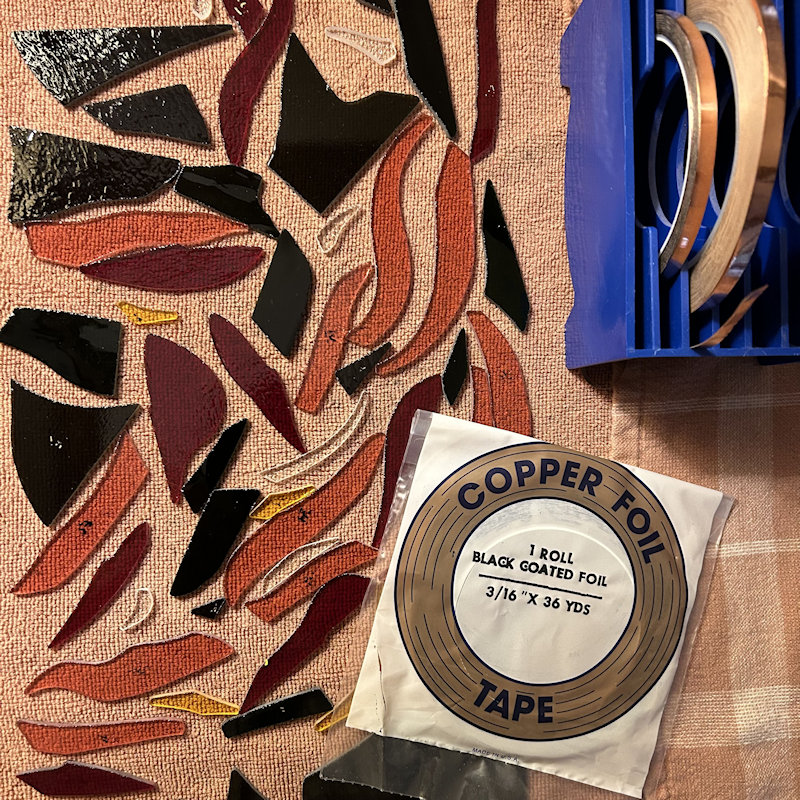
If
there are
a lot of pieces,
it can be helpful
to number them
.
Sometimes it’s
not easy putting the
puzzle back together again,
especially if some of the small
pieces are upside-down!
-=< O >=-
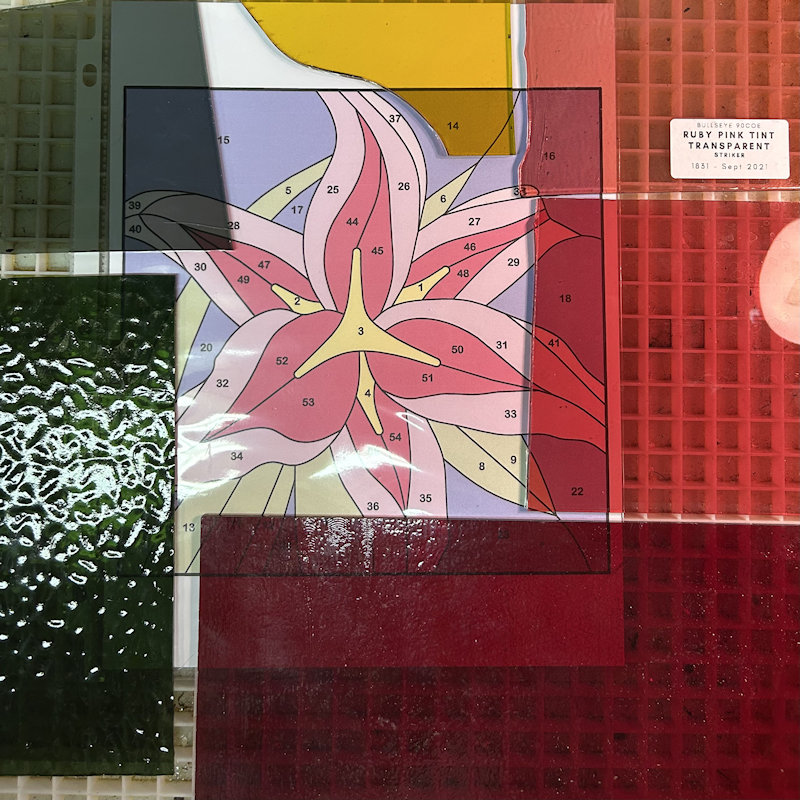
The next step
is to choose
the glass
.
I decided to use
all transparent glass
for this project, but some
glass styles are more opaque,
and there are many different
textures to choose from
.
(Glass that you can’t see through,
but still lets the light through
is called ‘opalescent’)
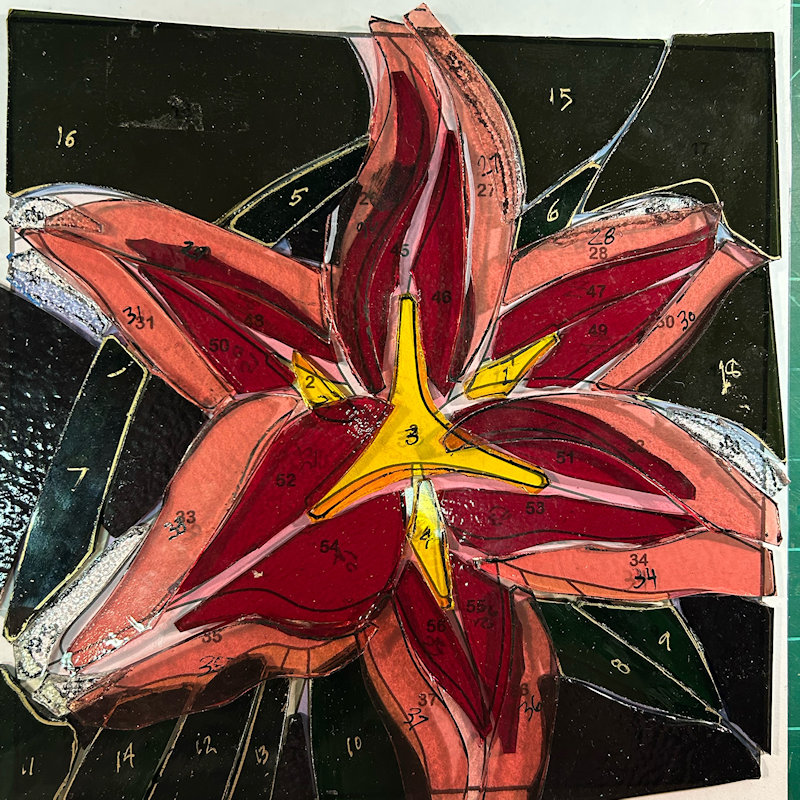
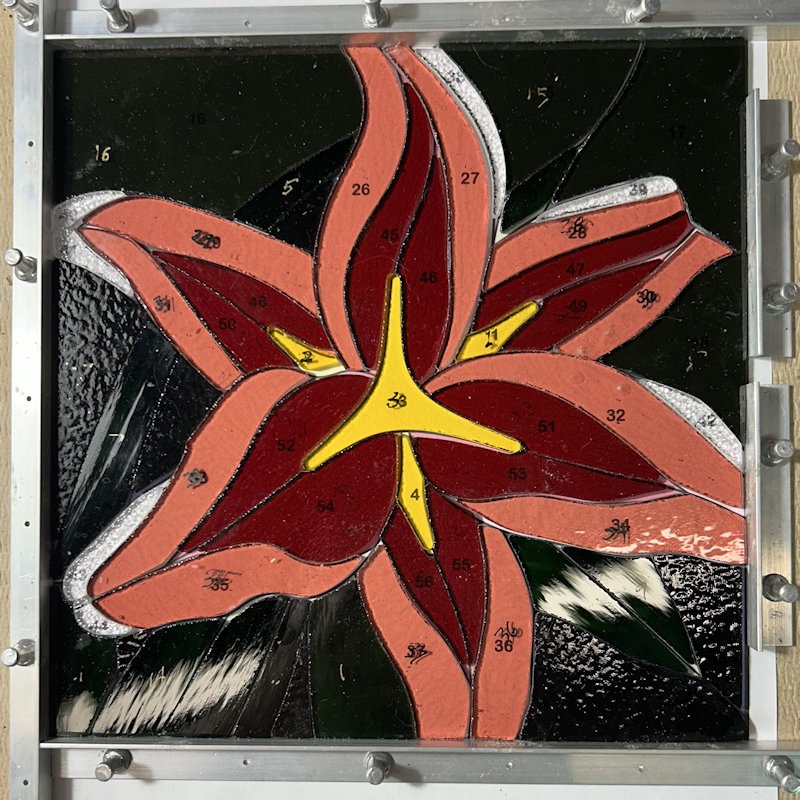
For this design
I chose darker background
colors so the flower would pop
:
-=< O >=-
After sorting
the pattern by color,
trace the pieces
on the glass
.
Arrange the pattern
pieces to conserve glass
(colored glass is expensive!)
I use Deco-Color pens
because they don’t wash off.
Some people prefer Gold
or Silver Sharpies, but
any type of water-
proof marker
will work
:
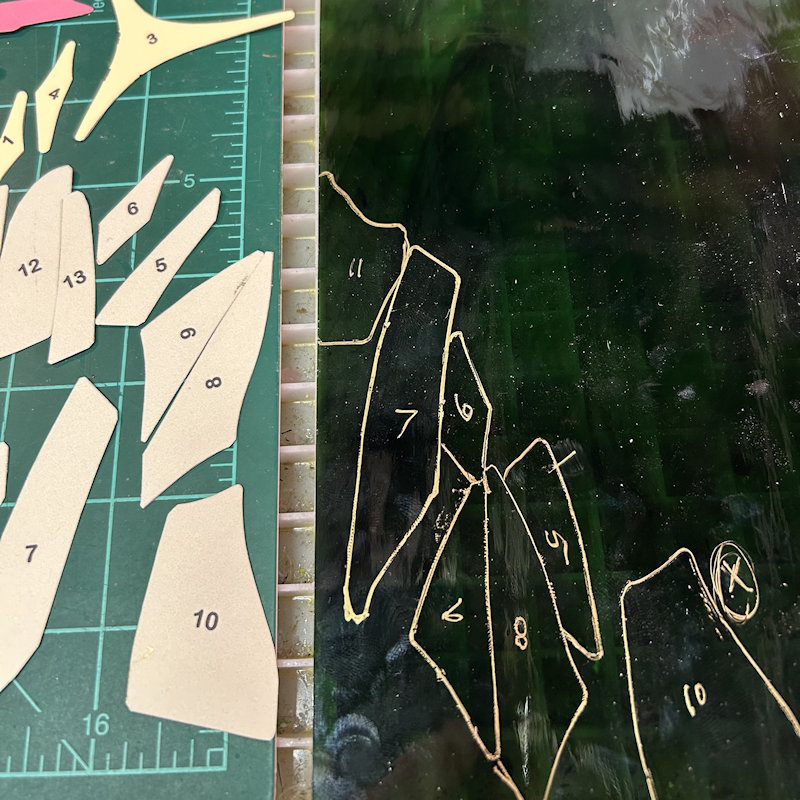
-=< O >=-
The glass for the leaves has
green streaks when held up to
the light, so I arrange the pattern
along the streaks so they look
more like the green leaves
in the original photo
.
-=< O >=-
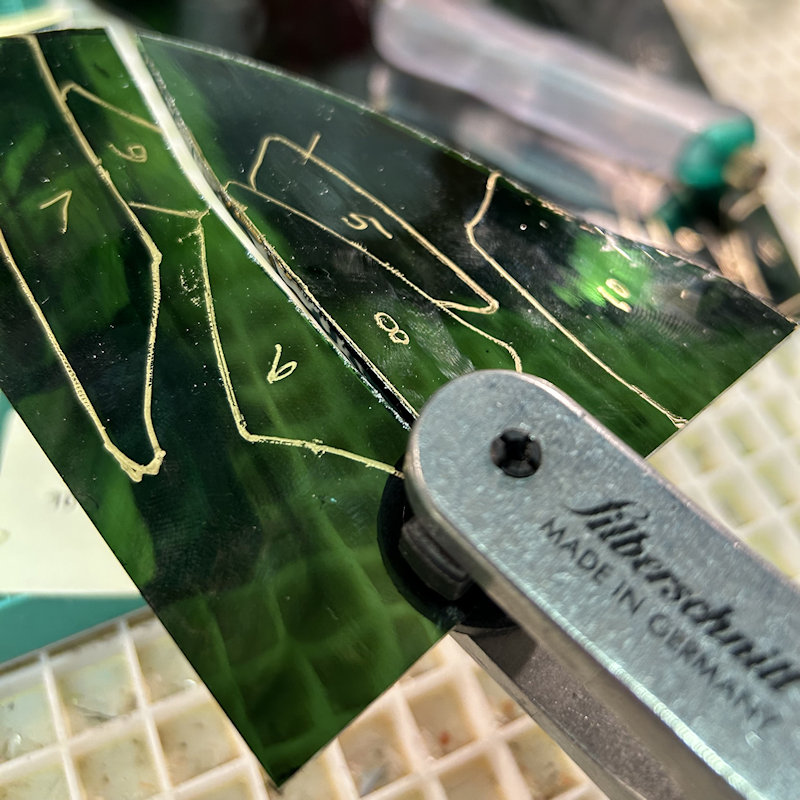
Now the glass can be
scored and broken
into pieces
.
A glass cutter has
a small wheel at the tip
that rolls along the surface,
putting a slight score
along the line
:
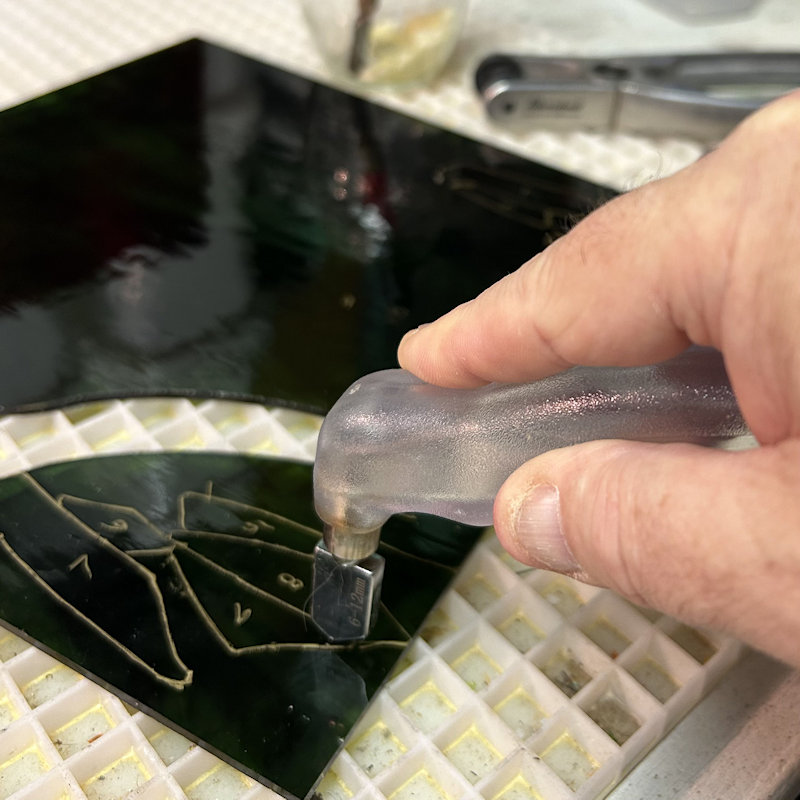
-=< O >=-
You can’t see it in
the photo above, but since the
lines were drawn AROUND the pattern,
the shape is slightly LARGER than we wanted,
and we also have to leave room for copper
foil and soldering between the pieces
.
To keep the pieces fitting properly,
the score line should be slightly
INSIDE the pattern line
.
Scoring the glass pieces at
the proper size will save
a lot of work later
.
-=< O >=-
After adding
a score line, the
glass can be broken
.
Hopefully
the break will
follow the line, but
not always, so try to
have more glass on
hand than you
think you
need
.
You can break the glass
just by putting pressure on it
with your thumbs, but here
I’m using Running Pliers
to make things easy
:
-=< O >=-
Running Pliers
put pressure across
one end of the score
line, and the crack will
‘run’ along the line
to separate the
pieces
.
-=< O >=-
It is more difficult
to score the bumpy side
of textured glass, so it works
better to turn the pattern pieces
upside down and score the
smooth side of the glass
:
-=< O >=-
Even though
the pieces don’t
fit well enough yet,
I’m laying them on the
other pattern as I
go along
:

-=< O >=-
After a lot more
scoring and breaking,
all the pieces are ready
to be ground into
perfect shapes
:
-=< O >=-
Notice how they
don’t fit very well, but
it is better to be slightly
large than too small
.
-=< O >=-
The grinder will
smooth all the edges
until there are no more
ink lines, which should
make a perfect fit
.
-=< O >=-
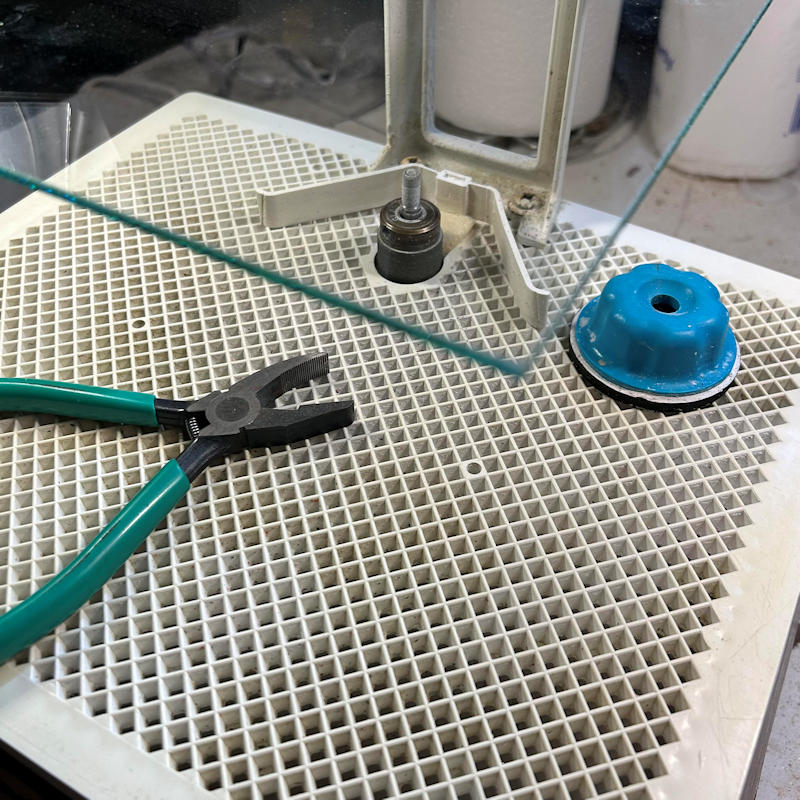
If a grinder is not available,
Grozing Pliers have a curved
serrated jaw that can be used
to round off the sharp corners
and remove the flashing
around the edges
.
The blue thing
in the photo above
is called a biscuit, which
can help push the glass
into the grinder bit
to protect your
fingertips
.
-=< O >=-
The grinder uses water
to keep the grinder bit cool,
and since the pieces get wet
while grinding them, I slide
the pattern into a plastic
page protector to
keep it dry
.
I use a larger
plastic sheet if the
pattern won’t fit in
a page protector
.
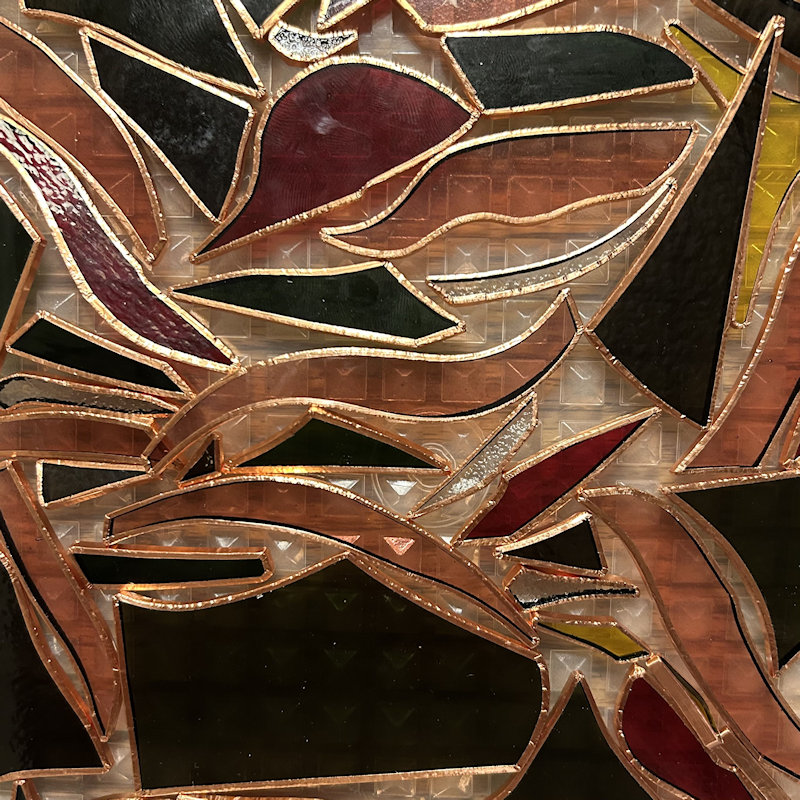
-=< O >=-
The pieces are carefully placed
on the pattern to make sure
I can see the black line all
around the edges
.
This will insure that
I have enough space
between them for
copper foil and
soldering
:
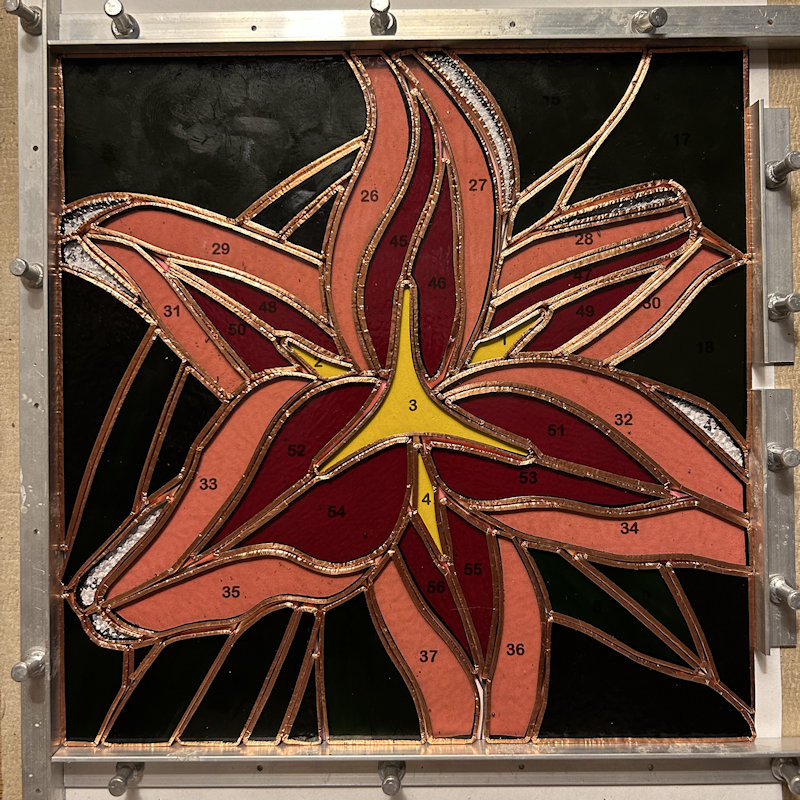
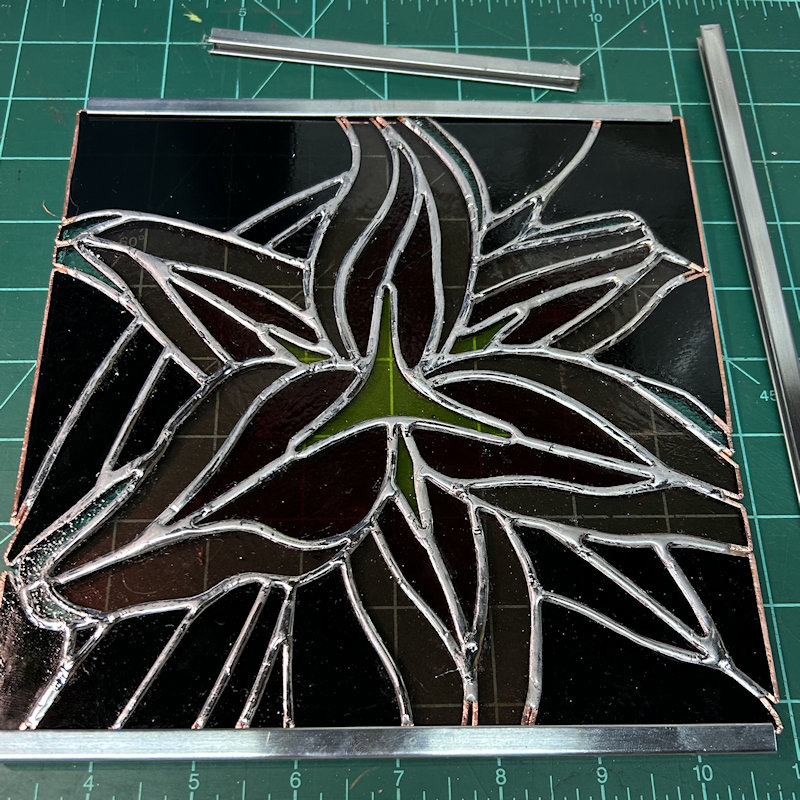
When the pattern is large
enough that I keep accidentally
bumping the pieces out of position,
I tack a frame around it to contain
the pieces and keep the
edges straight
:
-=< O >=-
…
Keep grinding and
fitting until everything
fits perfectly
:
-=< O >=-
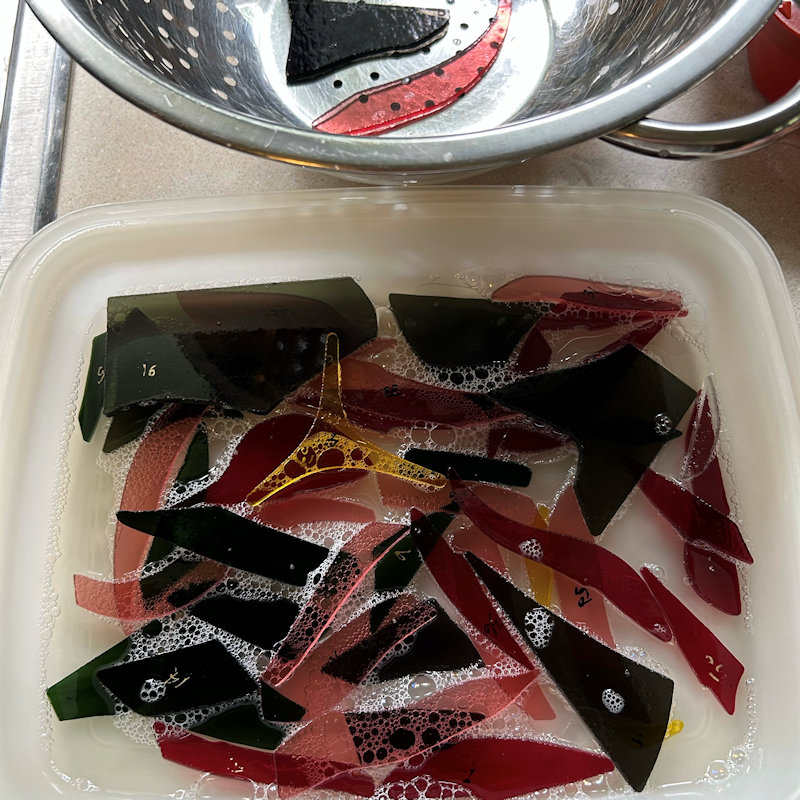
(let your cutter wheel
rest on an oiled pad at
the bottom of a jar when
you are not using it, so
it won’t corrode)
Wash the pieces
to get rid of
glass dust
and oil
:
-=< O >=-
After drying,
wrap copper foil
around each piece
and crimp down
the edges
.
The exposed side of
the tape will be copper,
but the other side can
be colored to match
the finished design
.
Notice that I’m
using BLACK COATED FOIL,
because the finished design
will have black patina
and a black frame
.
-=< O >=-
After wrapping foil
around the piece, crimp
it down around the edges,
and burnish it with something
to make it smooth; plastic
pen, popsicle stick,
anything will do
:
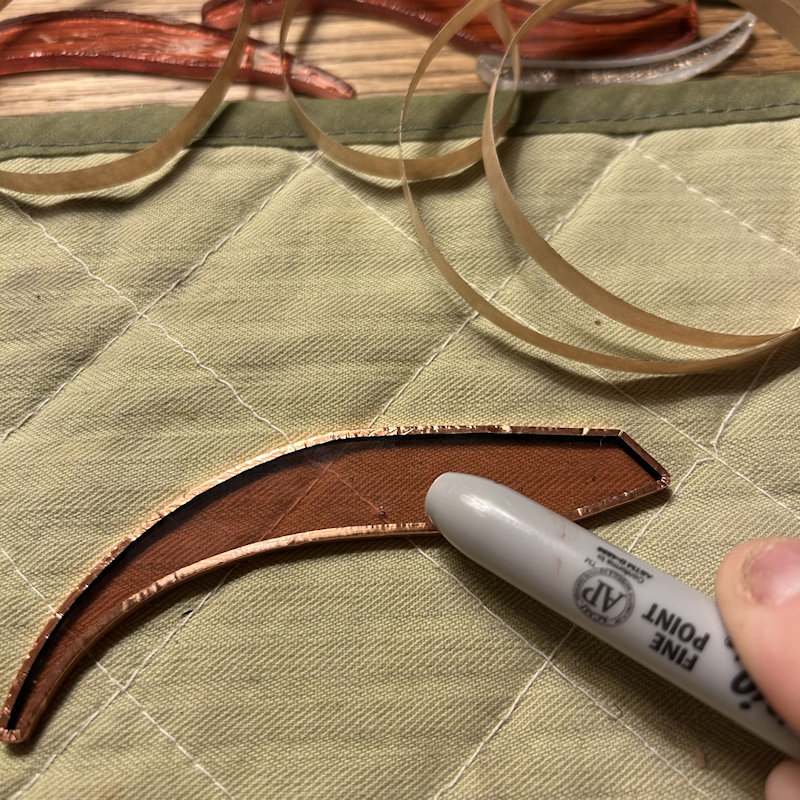
-=< O >=-
(For opalescent glass,
you you don’t have to pay
extra for black or silver backed
foils, because you can’t see
through it, anyway)
You might be able to see
black lines through the edges
of some of the pink pieces
:
-=< O >=-
The final test is
to see if everything
still fits comfortably
in the frame
.
I had to remove the foil
from two of these pieces
and grind a little more
…
-=< O >=-
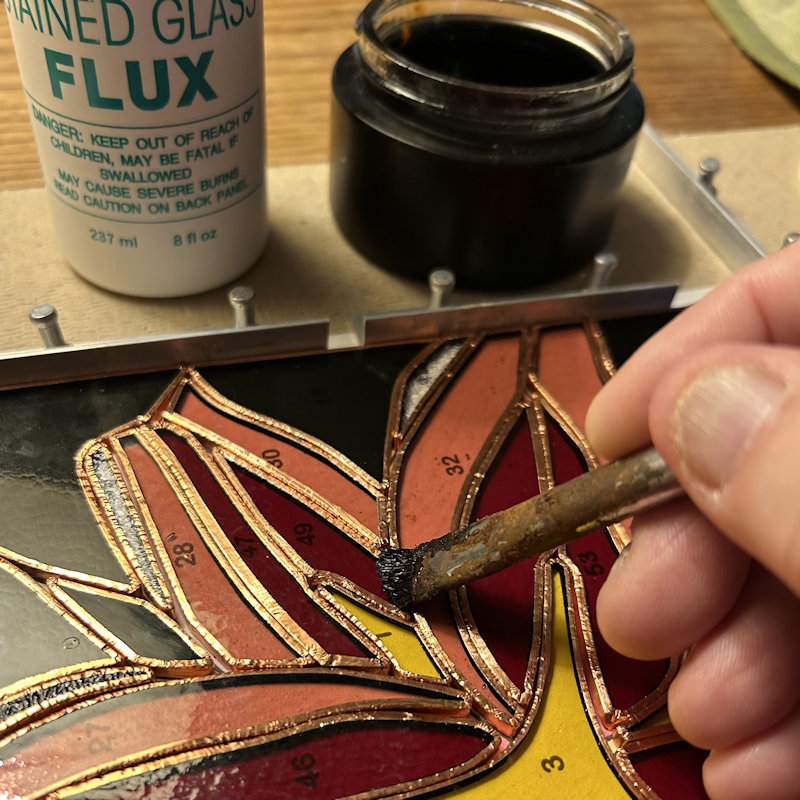
Flux is
brushed on
before adding
the solder
.
As the flux heats up, it
cleans the surface of
the copper so the
solder flows
better
:
-=< O >=-
I should mention that
I’ ve assembled everything
on a homasote board, which
is heat-resistant
.
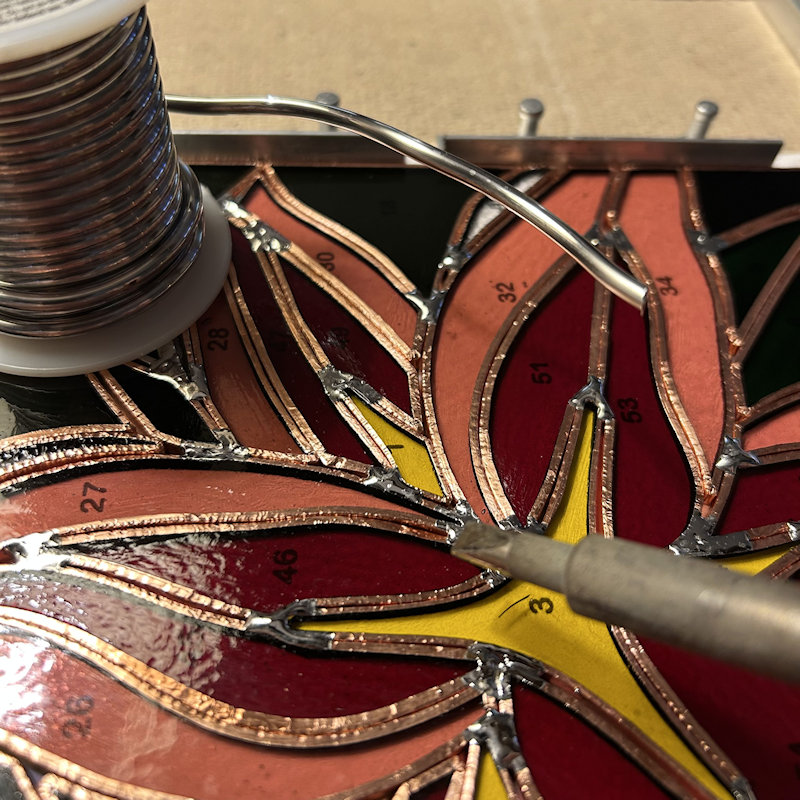
I start soldering by
placing a drop at each
intersection, which binds
everything together
.
-=< O >=-
Then I ‘connect the dots’
by soldering along the lines
between instersections
.
Apply enough solder
to get a rounded bead,
which will make it
stronger than a
flat bead
:
-=< O >=-
Keep the solder away
from the borders, because
the extra thickness can make
it more difficult to slide
the frame strips on
.
-=< O >=-
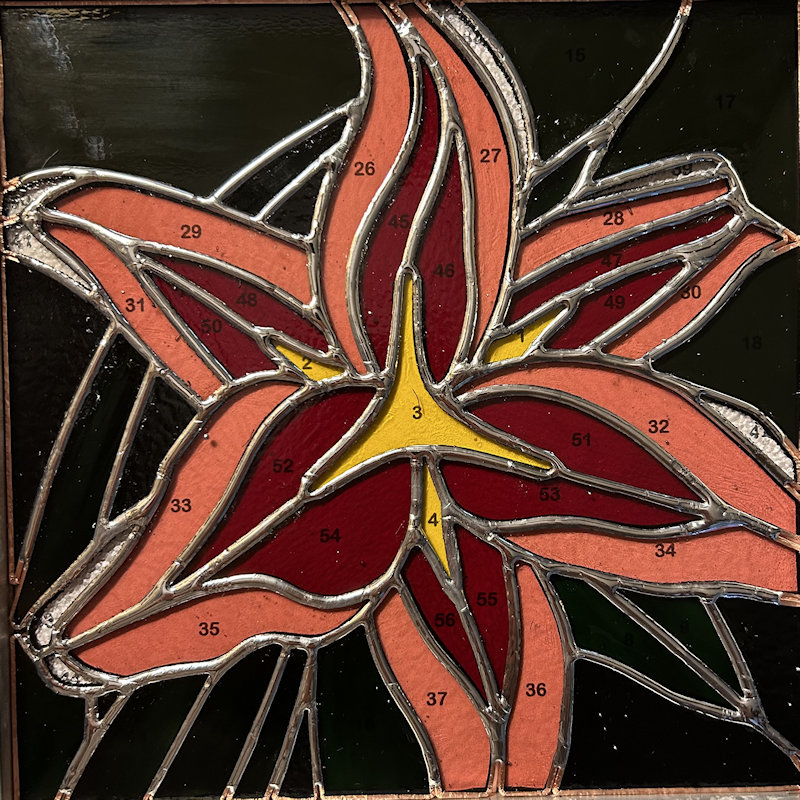
Turn it over
and solder the
back side
.
-=< O >=-
Sometimes
the molten solder
will drip through to the
other side, so make sure to
look at the front again
any smooth out any
rough areas
.
-=< O >=-
Flexible lead came
can be wrapped around
the whole thing to create
a nice border, but for this
project I want to use a
sturdier zinc came,
which has to be
cut with a
hacksaw
:
-=< O >=-
I drag solder onto the
frame at every spot possible,
and also at the corners to
make everything strong
.
I also soldered some
copper loops at the top
two corners to make it
easier to hang
:
-=< O >=-
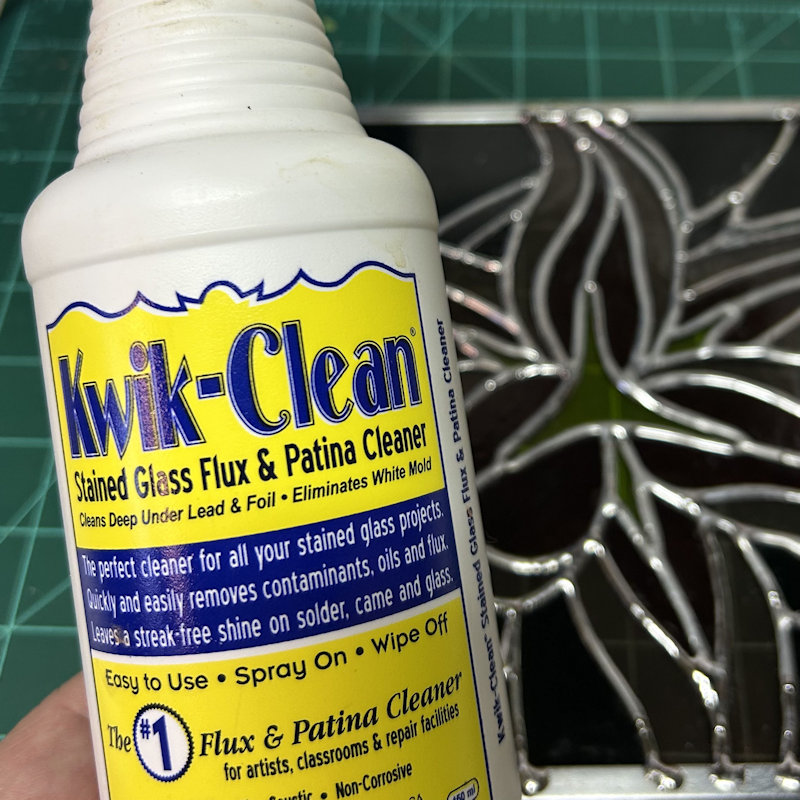
After soldering, the
flux has to be removed
because it is corrosive
.
Some people
just use soap and water,
and often mix in some baking
soda, but I pay extra for the
fancy store-bought stuff
!
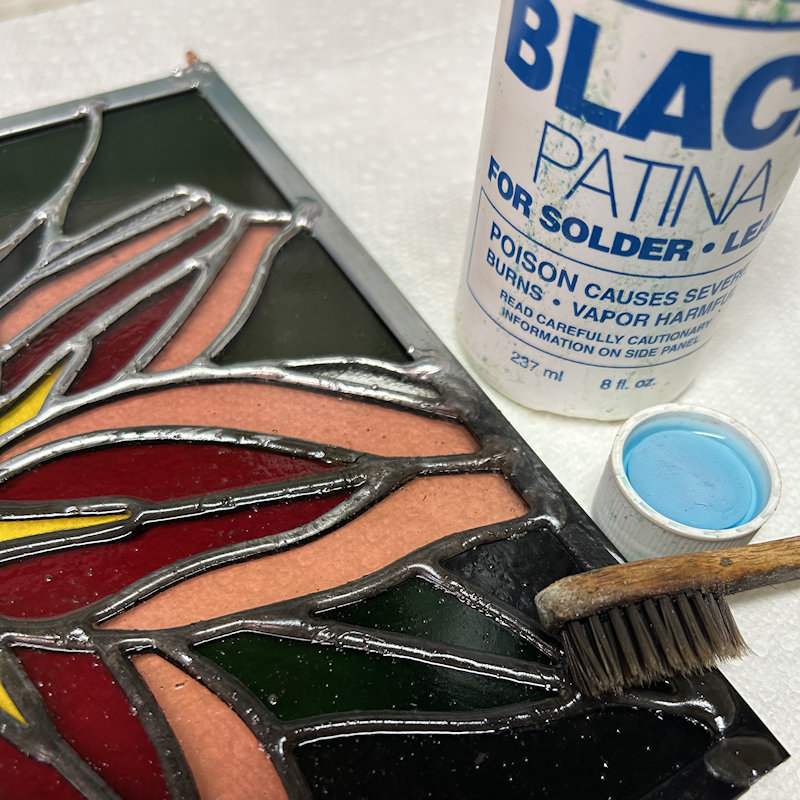
-=< O >=-
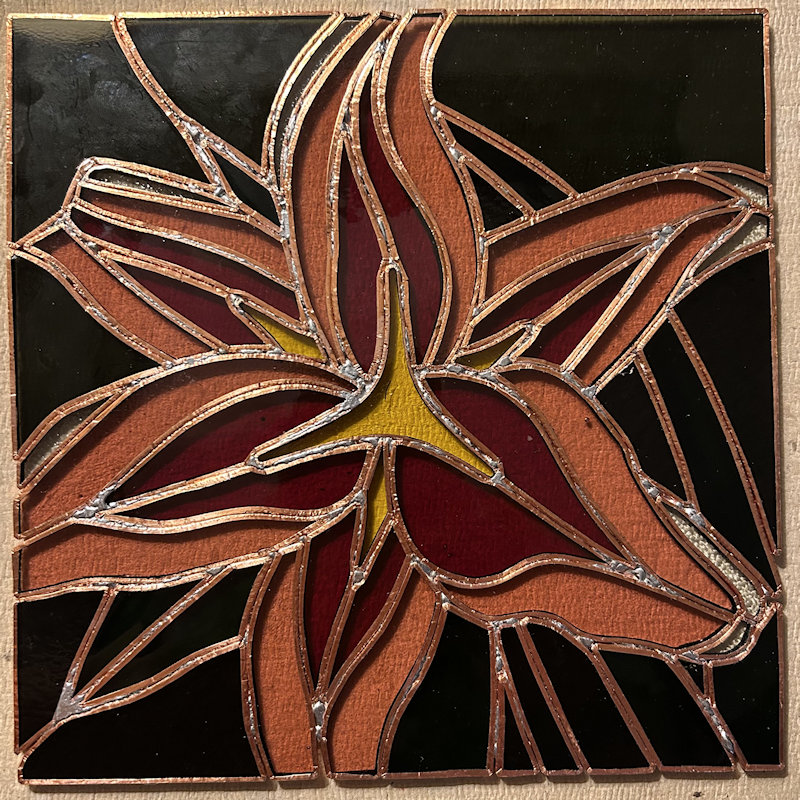
After the stained glass
has been cleaned and dried,
patina can be added to
the solder & frame
to color it
.
Pour out as little as possible
(I pour it into the cap), and use
a toothbrush or Q-Tip
to apply it
:
-=< O >=-
Patina
is also corrosive,
so wash everything
one more time
.
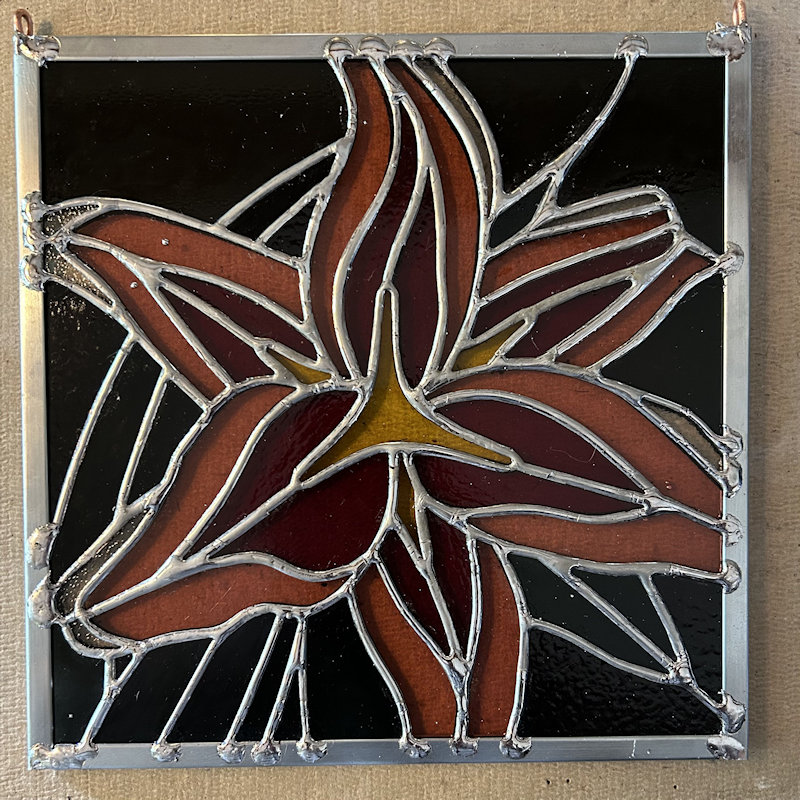
-=< O >=-
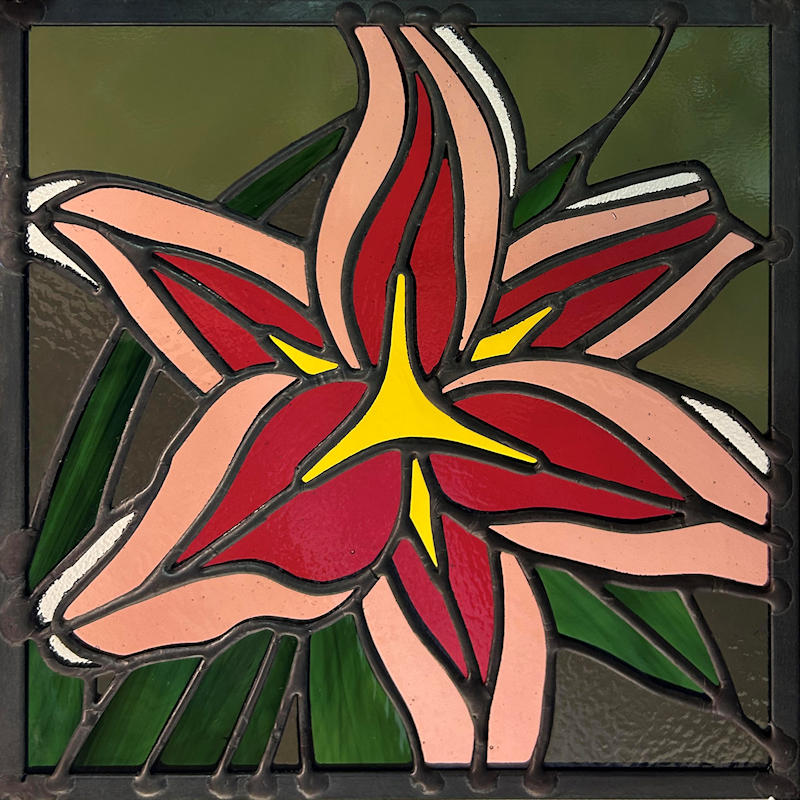
…
add a little wax
or Lemon Pledge to
shine it up, and
we’re done
!!!
I just realized that the only photo
I took was on a cloudy day and
there’s not enough light
shining through
:
-=< O >=-
I’ll try to add a
better photo next
time I visit Trish
.
Anyway,
she liked it
!!!
-=< O >=-
Ask questions
in the comments below,
and search ‘stained glass’
on YouTube for many
helpful videos
…
-=< O >=-